

How to use Amazon EC2 M1 Mac Instance for Testing and Building Apps for Apple Ecosystem
Use New Amazon EC2 M1 Mac Instances to Build & Test Apps for iPhone, iPad, Mac, Apple Watch, and Apple TV


Introduction
With the onset of EC2 Mac Instances, it was a lifeline for Apple Developers. It facilitates with
- Flexibility
- Scalability
- Less Expenditure
The Mac Mini Computers are the Source of the computing power at AWS Data centres connected to AWS Nitro System via Thunderbolt.
It connects to VPC and boots from EBS volumes. Security Groups and numerous AWS services. Just like how a typical Linux instance does.
Instances are meant to scale your build and test fleets of Macs. Practically, more resources = more expense.
The fun part is that no Hypervisor is active and you get the full bare-metal performance of the M1 hardware.
The Dedicated host reserves a machine just for your usage. How cool does it sound?
In our case, we will use the following hardware Configurations:
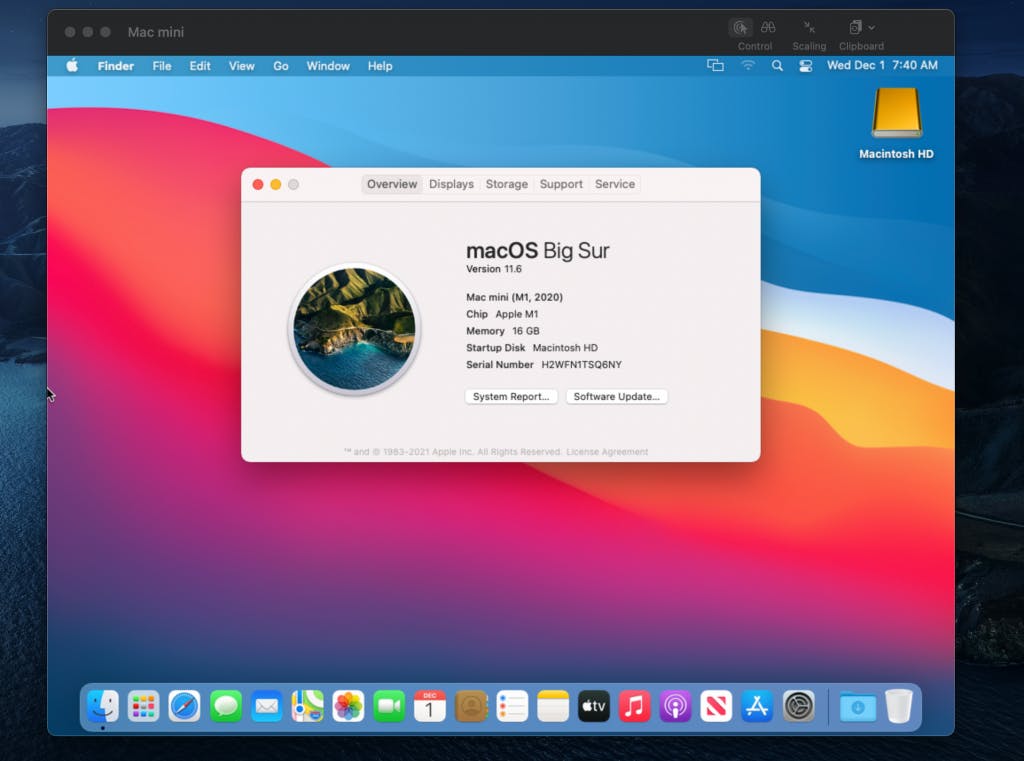
The Mac mini, featuring M1 SoC with 8 CPU cores, 8 GPU cores, 16 GiB of memory, and a 16 core Apple Neural Engine.

NOTE: For now, it's only available in preview in US East (N. Virginia) and US West (Oregon), with other AWS Regions coming at launch.
Hands-On
As I told in the Introduction, there is no VM involved. Each bare-metal server is hosting a Mac mini.
1. Creating a Dedicated Server
- Open the
AWS Management Console - Navigate to the Amazon
EC2section - Select
Dedicated Hosts Choose
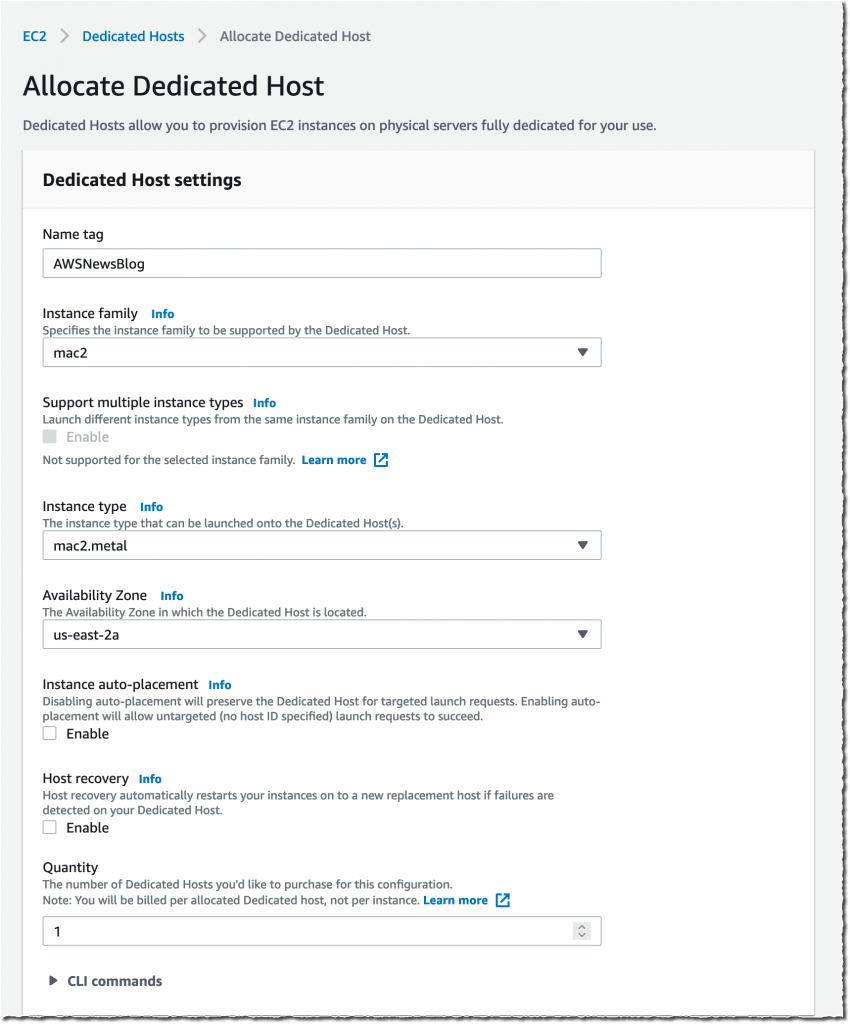
Allocate Dedicated Hostto allocate a server to my AWS accountSetup the
Allocate Dedicated Hostas mentioned below :
Alternatively, you can also use the AWS Command Line Interface (CLI).
  ~ aws ec2 allocate-hosts                  \
         --instance-type mac2.metal          \
         --availability-zone us-east-2b      \
         --quantity 1
{
    "HostIds": [
        "h-0fxxxxxxx90"
    ]
}
2. Start EC2 Instance
- Ensure that you select a macOS AMI version that suits your requirements.
- Then select the mac2.metal instance type
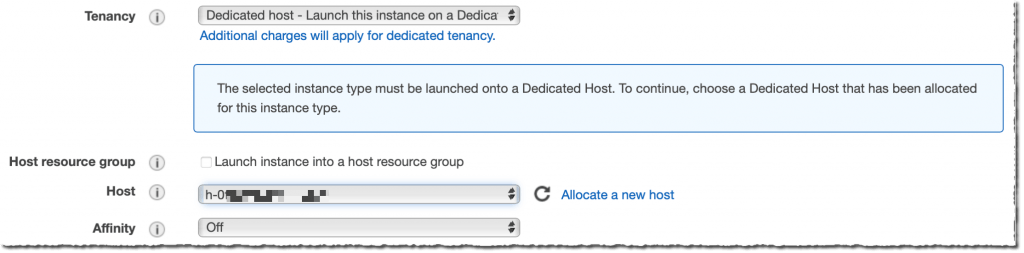
- Choose host Tenancy and the dedicated Host you just created.
Alternatively, you can also use the AWS Command Line Interface (CLI).
--instance-type mac2.metal                             \
        --key-name my_key                                      \
        --placement HostId=h-0fxxxxxxx90                       \
        --security-group-ids sg-01000000000000032              \
        --image-id AWS_OR_YOUR_AMI_ID
{
    "Groups": [],
    "Instances": [
        {
            "AmiLaunchIndex": 0,
            "ImageId": "ami-01xxxxbd",
            "InstanceId": "i-08xxxxx5c",
            "InstanceType": "mac2.metal",
            "KeyName": "my_key",
            "LaunchTime": "2021-11-08T16:47:39+00:00",
            "Monitoring": {
                "State": "disabled"
            },
... redacted for brevity ....
3. Accessing through SSH and VNC
- Use SSH to connect to the newly launched instance as usual

- You may enable Apple Remote Desktop and start a VNC session to the EC2 instance. The EC2 Mac instance documentation page has the details.
Follow me on Twitter, LinkedIn and GitHub for more amazing blogs about Cloud, DevOps and More !